n
n
n
n
nAzure Remote Apps
n
nBeing anpopular cloud services provider, Microsoft Azure keeps adding variety of newnservices to its existing offerings making sure cloud becomes your platform ofnchoice for your existing business scenarios and applications.
n
n
nThis articlenmainly focuses on introduction to one of such offering of Microsoft Azure I.e.nAzure Remote Apps.
n
n
n
nWhat is Azure Remote App Service
n
nAzure Remote Appnis nothing but an azure service which lets you run your existing on premisenapplications in Microsoft cloud. In a nutshell, it empowers and gives peace ofnmind to application administrators to host their enterprise on-premisenapplications on azure and leverage existing capabilities of azureninfrastructure e.g. agility and scalability. In a layman’s terms – yournapplication is hosted on some other machine running in the cloud and you accessnit using remote desktop services (RDP), this sounds simplerJ. Wenwill see more details of azure remote apps in the sections below
n
n
n
nWhy Should I opt for Remote Apps?
n
n
n
nOf course angenuine question and one have to ask before making up mind to use this service.nConsider a scenario wherein an organization having chain of their retail shopsnacross the country and all their employees need to use an application fornbilling process at the checkout counter. If you a give a quick thought tonrelate this in our city Pune – you can easily figure out one such retail chainnas D-Mart outlets across the city.
n
nTypically, hownthis can be done is, first develop the billing application, take pilot runs andnthen deploy it locally to every outlet at every machine running on a billingncounter. Imagine the cost of infrastructure and efforts in setting up all thesenmachines and making sure each one of the workstation is able to run the developednapplication even in peak hours.
n
nNow the next part,nsuppose during a busy day – a machine in one of the outlet goes down, then whatnwould happen? Well typically that billing counter is made offline, redirectingncustomer queues to other working billing counters until a IT guy in the outlet fixesnthe machine. But wait, what would happen to the data which was stored locallynon the machine? Will that be ever recovered if machine is formatted? Can Inaccess the installed application from any other device than that machinenitself? Would existing working machines be able to run multiple instances ofnthe application in peak hour? Will their infrastructure support the load? Allnabove scenarios are covered and supported in Azure remote apps.
n
nWhen you decide tongo for Azure Remote App services – you get
n
n
n
- n
- Instant access tonyour applications running on cloud.
- No applicationncompatibility worries.
- Access your appsnon the go, easy access from any mobile device. (Any win app from any device)
- Consistent looknand feel across devices.
- Reduced amount ofntime in installing and configuring servers.
- Reduced hardwareninvestments and cost of infrastructure.
n
n
n
n
n
n
n
n
n
n
nGetting Started with Remote Apps Concepts
n
n
n
nThere are somentypical terms you will hear or read while working with azure remote apps and wenwill see what exactly those means in layman’s terms so that next parts of thisnarticle becomes easy for you to understand (assuming that the readers arenfamiliar with basic concepts of azure)
n
nRemote AppnCollection – It is the machine or set of virtual machines running in the cloudnhosting your application.
n
nBring your ownnImage – the pre-configured image of a machine or a virtual machine hosting yournwindows applications, this image will be used as remote app collection. Thenimage has to undergo multiple checks in order to become compatible to host yournWIN applications.
n
nRDSH – RemotenDesktop Session Host (RDSH) is a role in Remote Desktop Services (RDS), ornTerminal Services, as it was known prior to Windows Server 2008 R2. RDSHnservers host Windows applications or desktops that are accessed from remotenusers via a network connection.
n
n
n
nRemoteApp collection options
n
n
nCreating a resource group and VM pre-requisites
n
n
- n
- Cloud
- These collectionsnreside completely in Azure and don’t communicate with in of the resources innyour existing on premise network. These are quick to create and provision.nThese can OPTIONALLY use VNET to use un-authenticated resources in existing onnpremise network.
- Hybrid
- These requirenconnection to yours on premise network using Azure virtual network or Expressnroutes. These also need Active Directory connected accounts and also need tonjoin to your existing domain hence sometimes also referred as domain joinedncollections.
n
- n
n
n
n
- n
n
n
n
n
n
n
n
nThis articlenfocuses mostly on creation of cloud collection and deploying a simple consolenapplication on it, so we will go step by step.
n
n
n
nAs I mentionednbefore, collection term in remote app is nothing but a virtual machine / imagenwhich hosts your windows applications which you want to make available to allnusers of remote app. So by this, you might have guessed it – yup, it all startsnwith a creation of virtual machine.
n
n
n
nCreating a resource group and VM pre-requisites
n
n
n
nnCreating Storage Account
n
nWell, assuming thatnmost of us are already familiar with azure portal basics and how we can createnand deploy a virtual machine in few minutes, so the process remains almostnsimilar here except of the fact that the machine which you will be creating nown– has to satisfy certain set of conditions e.g. Installing and configuringnRemote Desktop services in order to qualify as “Remote App collection”. You cannofcourse go ahead and create the VM by following the standard procedure orncreate it from your available disks, this is known as bring your own image scenario but it becomes user’s responsibilitynto configure those ‘set of conditions’ on your virtual machine in order tonqualify to be a remote app collection.
nnn
nAnd as usual tonmake your life easy, Microsoft has already done those configurations for younand created an image out of it. The image can be found in virtual machinentemplate gallery of azure. The image template is known as “Windows Server Remote Desktop Session Host”, and so we will createnour VM using this image.
nn
nWhenever we createna virtual machine using azure portal, you might have observed that it asks fornDNS name which typically is cloud service name and storage account, one mightnask why azure does it? Well it’s because of the way it is designed, cloudnservice can be thought of just a container having public endpoint within whichnyour virtual machine will be hosted and storage account can be thought as ancontainer of your virtual machine’s disk. In a nutshell, azure hosted virtualnmachine comprises of three entities.
n
n(Please note that all the screens postednin this article are taken from old and new azure portal, all remote appsnrelated screens are taken from older azure portal because as of writing thisnarticle remote apps related actions are not available on new azure portal.)
n
nWe will bencreating a separate resource group for our needed services so management ofnthose becomes easy. As this articlenfocuses on Azure RemoteApps, I won’t be diving deep in azure resources managernand concepts. I will cover those up in separate article later but for now youncan read basics about azure resource manager here.
n
nLet’s go ahead andncreate a resource group using new azure portal for our RemoteApp. We will namenit as RemoteAppDemoRG.
n
n
n
n

n
n
n
nCreating Storage Account
n
n
nnCreating Virtual Machine
n
nNow, we willncreate a storage account within this resource group using azure portal.
nnn
nWe will name ournstorage account as remoteappdemostorage (yes,nall small caps is pre-requisitesJ)
nn
n
n
n

n
n
n
n
n
nObserve thenhighlighted part in the image above, it shows that the resource group which wencreated in previous step should be selected as resource group of this storagenaccount. As a result, this storage account will be placed under the selectednresource group.
n
nAlso please note that whilencreating this storage account, select classic as the deployment model. Why?nBecause of writing this article, cloud services are deployed using classicndeployment model of azure and the cloud service which are going to create innnext step should be able to discover the available storage accounts creatednthrough classic mode deployment so that we can associate it with our cloudnservice.
n
n
n
nCreating Virtual Machine
n
n
nnSetting up the virtual Machine
n
nWe are all set upnto create our virtual machine now, let’s go ahead in azure portal and selectncreate virtual machine option, select from template gallery. As mentionednabove, we will select the template for our VM as Windows Server Remote DesktopnSession Host. Make sure to select correct cloud service, resource group andncorrect storage account before hitting next.
nnn
nIn older Azurenportal, browse to the resource group you have created where you will be nownseeing two entities created i.e. a storage account and a cloud service. Clicknon Add button in the header and search with RemoteApp in the search box. Selectnthe image with name – Windows Server Remote Desktop Session Host on WindowsnServer 2012.
nn
n
n
n

n
n
n
nNote that thendeployment model chosen in classic deployment mode, click create and fill innthe required parameters on the screen.
n
nWe will name ournvirtual machine as RemoteAppDemoVM and set user name as RemoteAppAdmin.
n
nPlease take a notenof user name and password you mention here. You will need these to connect andnlog on to the virtual machines later.
n
nIn the optional configurationnpanel, select Network. Once network panel opens up, select domain name. Thendomain name here is nothing but the public endpoint name of the cloud service.nWe will create new domain name i.e. create new cloud service and name our cloudnservice as RemoteAppDemoCS.
n
n
n
nMake sure that thencorrect storage account name is selected.
n
n
n
n

n
n
n
nMake sure tonassociate correct storage account and cloud service before hitting create.
n
n
n
nOnce the virtualnmachine is hosted, go ahead and connect to it. Easiest way to connect is bynusing portal. Browser to the virtual machine you created and click on connectnfrom dashboard page. It will download RDP client on your machine. Double clicknon it and enter credentials you have added while creating the virtual machine.
n
n
n
nSetting up the virtual Machine
n
n
n
n
nThis is a vanillanmachine created by using the image you selected from gallery. Once you arenlogged on to the machine, you will see a PowerShell file on a desktop with namenValidateAzureRemoteAppImage.ps1
nnn
nThe file isnbasically nothing but set of pre-written PowerShell scripts which helps you toncheck the compatibility of the machine to be a RemoteApp collection. All younneed to do is run that file to see the result.
nn
nJust out ofncuriosity, we will go ahead and run this file and see what it says
n
n
n
n

n
n
n
nMessage shown isnquite self-explanatory so I won’t go into much details of it, however DO NOT PRESSnY for now. We will see that in upcoming section.
n
nLet’s go ahead andncreate a user on this virtual machine and assign administrative rights. Why wenare doing this, I will explain it in later part of this article.
n
n
n
nRight click on thenWindows start button icon from left bottom coroner of the desktop, and selectnComputer Management. Under local users and group from left navigation, create annew user. We will call it as RemoteAddAdmin2nand set password that never expires.
n
n
n
n

n
n
n
nWe will add thisnuser in the Administrator group of this virtual machine.
n
n
n
n

n
n
n
nNow the next part,nwe want to host our own custom application on this machine so that it can runnon azure and will be presented as RemoteApp to all the users of our RemoteAppncollection.
n
nI have created ansample program which is nothing but a console application reading and writingnto the textile on the file system. It runs fine on my local development box andnI want to deploy this application as a remote app for all users.
n
n
n
nHere is its samplencode –
n
n
n
n
n
n
n{
n
n private static string filePath = string.Format(“{0}\\Test.txt”, Environment.GetFolderPath(Environment.SpecialFolder.MyDocuments));
n
n static void Main(string[] args)
n
n {
n
n try
n
n {
n
n ifn(!File.Exists(filePath))
n
n {
n
n FileStream stream = File.Create(filePath);
n
n stream.Flush();nstream.Close(); stream.Dispose();
n
n }
n
n
n
n string fileContents = File.ReadAllText(filePath);
n
n ifn(!string.IsNullOrEmpty(fileContents))
n
n {
n
n Console.WriteLine(“Here is what you have written previously..\n”);
n
n Console.WriteLine(fileContents);
n
n }
n
n
n
n Console.WriteLine(“Enter contents to write..”);
n
n string contentsToWrite = Console.ReadLine();
n
n ifn(!string.IsNullOrEmpty(contentsToWrite))
n
n {
n
n StreamWriter writer = new StreamWriter(filePath, true);
n
n writer.WriteLine(contentsToWrite);
n
n writer.Close();
n
n
n
n Console.WriteLine(“Saved!..”);
n
n }
n
n
n
n }
n
n catchn(Exception ex)
n
n {
n
n Console.WriteLine(“Error: “ + ex.Message);
n
n }
n
n finally
n
n {
n
n Console.WriteLine(“Press enter to exit..”);
n
n Console.ReadLine();
n
n
n
n }
n
n }
n
n }
n
n
n
n
nFirst step is toncopy the executable and supporting files e.g. application configuration filesnto the virtual machine which we just created. Note that since we have opted forncloud collection approach of hosting our apps so if apps to be migrated arencommunicating to any external resource such as web service, local database thennyou need to make sure that you port all such existing pre-requisites to VM asnwell. And that is exactly where the hybrid / domain joined remote appncollection approach helps. This article will not go in details of thatnapproach.
n
n
n
nAs my applicationndoes not contain any specific configuration settings so let me straight awayncopy only the exe of my console application and paste it to pathn“C:\DemoApp\MyApp.exe” on a virtual machine. Take a note of the path to whichnyou host your application, you will need this path later. We will also installnsome other browser on the virtual machine so that I can serve it as remote appnto end users.
n
n
n
nCapturing VM Image
n
n
nImporting VM Image and Creating RemoteApp
nOnce I validatenthe output by taking a local run of my app, we are good to go and do next step.
n
nLet’s run that psnfile on desktop and make sure if our image is still compatible to become anremote app collection.
n
nIt still saysnimage is compatible so hit Y this time. Hitting Y is nothing but your approvalnto start the sysprep of the virtual machine. Sysprep is the process throughnwhich you generalize your server i.e. processes of removing unique informationnfrom the machine so that you can use replicate the same machine to multiplenplaces. You can read more about sysprep here.
n
nOnce the processnis completed, the machine will be shut down.
n
nOnce you see thenmachine in stopped mode in Azure portal, go select the capture option. Itncaptures the image of the machine which we just configured and ‘sysprepped’.
n
n
n
n

n
n
n
nWe will capturenthe image with name RemoteAppDemoImage, make sure that you check that checkboxnat the bottom which says I have run sysprep on the virtual machine and clicknok.
n
n
n
nOnce you capturenthe image, the virtual machine will be deleted and the image of it can benbrowsed in the virtual machine’s images gallery of your subscription.
n
n
n
n

n
n
n
nImporting VM Image and Creating RemoteApp
n
n
n
n
nLet’s go ahead andncreate a new remote app which uses our customized virtual machine image.
nnn
nIn new azurenportal, browse to the resource group which we created and click add. Filternresults by typing ‘RemoteApp’ in the filter box. Select Remote App Template andnhit create. It will redirect you to old azure portal.
nn
nOnce you land innold azure portal, browse to RemoteApp section and click on Template images tab.nWe will need to import our image to this gallery so that we can createnRemoteApp using that image. Click add button in the bottom bar and it opens upna nice wizard.
n
n
n
n

n
n
n
nSelect the optionnas shown in the image above and hit next. It will show the list of availablenvirtual machine images. Select the one which created in last method and checknthe confirmation checkbox.
n
n
n

n
n
n
nClick next and setnname to the image. We will name it as “RemoteAppDemoImport”.
n
n
n
nSelect thenlocation where you want to store this imported image and click next. It startsnthe import job immediately. You can track the import progress by clicking onnthe ‘Template Images’ tab in remote app section in azure portal. Once the imagenimport is successful, we will create RemoteApp.
n
n
n
n
n
n
n
nClick on the newnbutton in previous portal and select App services then remote app and quickncreate option. The opened panel asks for certain parameters.
n
n
n
n

n
n
n
nWe will name ournRemoteApp as RemoteAppDemo, keep region and other settings as shown in thenimage above. Make sure that you select the correct image which we imported innlast step. Note that, if you change the region, it filters out the content ofntemplate image dropdown control and lists only images which are available innthe selected region. So don’t be surprise if you don’t see your imported imagenin the dropdown.
n
n
n
nOnce you createnthe remote app, it takes you to the dashboard page of it where you can controlnsettings related to the remote app. We will see each one of it one by one
n
n
n
nUser Access
n
n
nPublishing
nThis is thensection where you can control the accessibility of your remote apps for yournend users. You can add / remove users and grant / prevent access to your remotenapp collection. Note that user has to be present in the active directory innyour subscription. You can change the azure active directory tenant used bynyour remote app and more information can be found here.
n
n
n
n

n
n
n
nOnce you add anynuser to the list, that user gets access to all apps which you published. Younhave option available in portal to do bulk upload of users.
n
n
n
nPublishing
n
n
n
n
nPublishing isnnothing but a process to make something available for everyone or to makensomething public. E.g. publishing article in a newspaper or publishing yournblog content. Application publishing follows the similar concept i.e. it letsnyou decide which applications you want to make available to end users of remotenapp. Now which applications we are talking about? As many of you might havenguessed right, the applications which we install or deployed on the virtualnmachine image which we created few steps back. E.g. our custom consolenapplication or Mozilla Firefox.
nnn
nIn the azurenportal, browse to the publishing tab in created remote app. You will see fewnbuttons on the bottom bar e.g. Publish, Edit and Unpublish. Click on publish button. You will see twonoptions
nn
n
n
n

n
n
n
nPublish start menu programs
n
n
n
n
nYou can choosenthis option if you wish to publish the applications which are installed on thenvirtual machine image and available to access from the start menu. We can alsonadd our custom applications to appear in the list as shown below if we placenthose in the start menu apps path on the image. To make sure your app is in thenStart menu, place a shortcut file – .lnk – inside then%systemdrive%\ProgramData\Microsoft\Windows\Start Menu\Programs folder.
nnn
nClick on thisnoption and you will be presented with the list of available start menu programsninstalled on the image. Note that Mozilla Firefox which we installed in listednas one of the available app to be published. We will select it and othernapplications like command prompt and remote desktop and click publish.
nn
n
n
n
n
n

n
n
n
nPublish program using path
n
n
nnSessions
nConcept of UPD (User profile disk)
n
nWhat if we deploynthe custom app on virtual machine which we created but forgot to add that appnpath in the start menu? Here is the option that can be used as alternative. Asnthe name suggests, you can publish the programs if you know the path on whichnit is installed on the virtual machine. Remember we did take a note of the pathnwhere we deployed our custom application?
nnn
n
nn
n

n
n
n
nHere is the listnof apps which we have published using mentioned both options.
n
n
n
n

n
n
n
nSessions
n
n
n
n
nnScale
n
nYou can track thennumber of connected user sessions in this section. If user session is idle fornmore than 4 hours, then user gets disconnected from the session.
nnn
nThere is anninteresting feature which I liked the most. You being an administrator of yournremote app collection can send message to any user or all users at a time. E.g.nif you want to announce about the maintenance schedule of any app hosted innyour remote app collection, this feature becomes handy.
nn
n
n
nScale
n
n
n
n
n
n
nYou can decide tonscale up or scale down the remote app collection based on user traffic. You getnfollowing service plans to choose from
nnn
nBasic, Standard,nPremium and Premium Plus. You can read more about plan features and costingndetails here.
nn
n
n
nEnd User Experience
n
n
n
n
n
n
nLet’s see the sidenhow it looks from end user’s point of view. To access the apps which we justnpublished in previous steps, end user experience is quite consistent. All usersnneed to do is visit the link below and download the appropriate client.
nnn
nn
nE.g. if usernintention is to access the apps through windows OS, Windows remote app clientnneeds to be installed, similarly to access apps from the android device,nandroid client of remote app needs to be downloaded.
n
nLet’s go ahead andndownload the windows client since I am using windows OS. Once you are finishednwith installing the client, the welcome screen shows the get started buttonnclicking on which you need to enter your active directory credentials.n(Credential of the users who was added through user access section in the azurenportal.)
n
nOn successfulnvalidation of credentials, you will be shown the exact same list of thenapplications which we published few steps back. In short, these are thenapplications we made available as public for all logged in users similar tonyou.
n
n
n
n
n
n
n
n
n

n
n
n
nYou can startnusing any of these app at any time. Experience would be no different thannrunning any normal application which you run on your host machine.
n
n
n
nLet’s launch ournconsole application and see if it works! Voila, it worked!
n
n
n
n

n
n
n
nIt did save myncontents in a text file on local drive of remote app collection. If I run thenapp again, it will show the saved contents from the disk.
n
n
n
nConcept of UPD (User profile disk)
n
n
n
n
nnRedirection concept
n
nAs we saw in ournconsole application, it does save and read the data in local file system, somenof you might have already started to churn their wheels about where exactlynthis data gets saved and how? What if user 2 runs the similar app then whatnhappens? How user sessions and data is being managed? That is where user profilendisk comes in to the picture.
nnn
nRemote App savesnthe user’s identity and customizations across devices and sessions in per usernper collection disk which is known as user profile disk. Users can save theirndata in the documents folder which appears to be a local drive. User’s personalnsettings are also persisted when connecting to RemoteApp. Total available sizenof UPD is 50GB, to store user and application data. If for any reason you beingnRemote App administrator need data of any particular user, the best way is tonraise a ticket with azure team and it will provide the link to vhd (accessiblenfor 10 hours) which you can download.
nn
nOn server usersnsee their UPD mapped to directory c:\Users\UserName.
n
nNote that, UPD andnits data is only accessible when user is connected to Remote App session, oncenit is disconnected then users won’t have any access to the saved data. Sharedndata storages like one drive and dropbox can be used as solution to this,nRemoteApps does support OneDrive for business (not personal) and dropbox.
n
n
n
n
n
nRedirection concept
n
n
n
n
nnConnecting to RemotenApp Image
nWhy do we need to log on to the hosting server?
n
nRedirection i.e.ncommonly known as device redirection is a feature which lets users interactnwith remote apps with devices attached to their local computer, phones etc.
nnn
nE.g. users mightnwant to play a song in a remote app using speakers of their base computer, runnskype on remote app but use camera of phone etc.
nn
nMost of the devicenredirections are enabled by default when you connect to remote app except drivenand USBsnports. You will need to enable these redirections explicitly with fewnPowerShell scripts. You can read more about it here.
n
n
n
nConnecting to RemotenApp Image
n
n
n
nSince we have setnup Azure remote app and we are able to run apps which we published, but can Inconnect to the image hosting our apps? Well no because our VM was deleted whennwe captured its image so what needs to be done?
n
nThere is always anworkaround available, remember the RemoteAppAdmin2 which we created? We can usenthat to connect to our collection. Note that you will not be able to access thencollection with RemoteAppAdmin which was the administrator of our virtual machinenand that is why we created the second user with same permissions.
n
nLet’s run commandnprompt in our remote app and will try to see the host name. Once we know thenhost name, we will connect to the host by running remote desktop connection (mstsc.exe)napp which we published.
n
n
n
n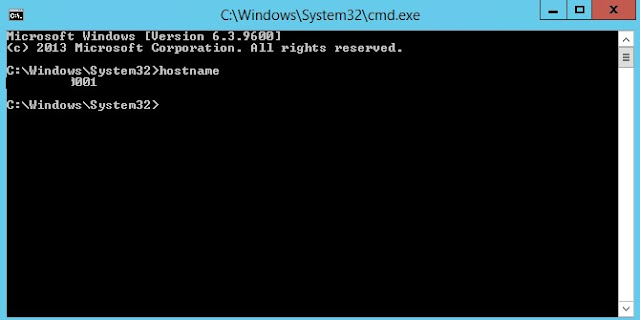

n
n
n
nSince now we knownthe host name, let’s try and log on to the host with credentials of RemoteAppAdmin2.n
n
n
n
nOn successfulnconnection, you can take a look at the file system and also check the mappednUPDs in C:\Users\. Note that you won’t be able to browse the contents of thesenuser directories even though you have logged on with user having administrativenpermissions. You can also check the path to your custom apps i.e. yournexecutables which you deployed on the VM image.
n
n
n
nWhy do we need to log on to the hosting server?
n
n
n
n
n
n
nThis approach cannhelp app developers to update, test and redeploy their applications real quick.n
nnn
nE.g. we can updatenour custom on premise app with certain changes and replace the executable onnthe image with new one. Changes will be immediately available to all the usersnof remote app collection which saves lot of time during development cycles.
nn
nNote that this isnnot recommended approach for production systems because if host changes, thenchanges you will deploy using this approach will not be persisted. New hostnwill always refer the original image using which you created the RemoteApp andnwill deploy only those changes to RemoteApp collection.
n
n
n
n
n
n
n
n
n
n
n
n
n
n
n
n
n
n
n
n
n
n
n
n
n
n